Difference between revisions of "Make a charcoal chimney"
Jump to navigation
Jump to search
| (6 intermediate revisions by 3 users not shown) | |||
| Line 1: | Line 1: | ||
| − | Lighting charcoal | + | Lighting charcoal briquettes without lighter fluid is easy with this '''homemade Charcoal Chimney''' |
| Line 7: | Line 7: | ||
* 1 can opener | * 1 can opener | ||
* 1 church key | * 1 church key | ||
| − | * | + | * 2 Wire coat hangers |
| − | * 1 drill with a | + | * 1 drill with a 1/8" drill bit |
* 1 pair of diagonal cutters | * 1 pair of diagonal cutters | ||
| − | * 1 pair of needle nose | + | * 1 pair of needle nose pliers |
| + | == Making the Charcoal Chimney == | ||
| − | == | + | === Placing the holes === |
* Begin with a clean #10 tin can remove any labeling that may be on the can. | * Begin with a clean #10 tin can remove any labeling that may be on the can. | ||
| − | * | + | * With the can opener remove both ends to form a basic chimney (Fig 1) |
| − | |||
| − | |||
| − | |||
| − | + | [[image:chimney01.jpg|thumb|center|Fig 1. Removing the ends]] | |
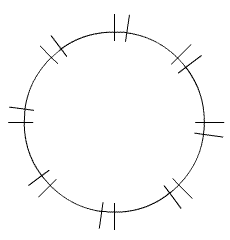
| − | + | * Using the church key make a series of triangular holes on one side of the can separated by about 2 inches (see Fig 2.) (this side will be referred to as the bottom) | |
| − | |||
| − | |||
| − | |||
| − | |||
| − | |||
| − | |||
| − | |||
| − | |||
| + | [[image:chimney02.jpg|thumb|center|Fig 2. Placing Triangular Holes]] | ||
| + | * Drill two sets of eight holes about 3 inches from the bottom of the can (see Fig 3.) with about 3/4 of an inch separating the 2 holes in each set | ||
| + | |||
| + | [[image:charcoal-chimney-holes.gif|center|Fig 3. Placing 2 sets of 8 1/8" holes]] | ||
| + | * Drill 4 holes for handle (see illustration) | ||
| + | |||
| + | |||
| + | === Making a Wire Mesh === | ||
| + | |||
| + | * Open the coat hangers and straighten with the pliers | ||
| + | * Cut the coat hanger into 12 8 inch pieces using the diagonal cutters | ||
| + | * With the pliers form a hook at one end of each of the 12 pieces of wire about 3/4" in diameter | ||
| + | # Thread the straight end of the wire through the can to it's opposite hole making sure to thread the hook end into it's corresponding hole | ||
| + | [[image:chimney03.jpg|thumb|center|Fig 4. Threading the Hanger wire]] | ||
| + | * Insert the hook into the the hole nearest it and using the pliers, on the inside of the can bend the wire so that it cannot be removed from the can (see Fig 5. for what this should look like) | ||
| + | * Repeat the inserting process for all the holes, you may have to drill additional holes and place additional wires to make a tighter mesh depending on the size of charcoal you plan to use. (I had to do this, see Fig 5.) | ||
| + | [[image:chimney04.jpg|thumb|center|Fig 5. Finished Wire Mesh]] | ||
| + | |||
| + | |||
| + | === Making the Handle === | ||
| + | * For the handle drill 2 sets of two holes, one set at the top of the can and another near the mesh. Drill the sets vertically | ||
| + | * take the remainder of the coat hanger and fasten it in the same manner done when creating the mesh (See Fig 6.) | ||
| + | [[image:chimney05.jpg|thumb|center|Fig 6. Finished product]] | ||
== Warnings == | == Warnings == | ||
| − | Be careful, I cut myself twice while building this be smarter than me, use gloves. | + | * Be careful, I cut myself twice while building this be smarter than me, use gloves. |
| + | * I make absolutely no claim to the safety of this project, make it and use it at your own risk. There are professionally built Charcoal Chimneys on the market (see [[#Amazon's Related Products]] below.) Please consider buying one if for any reason you feel uncomfortable about making your own. | ||
| + | |||
| + | |||
| + | == Usage Notes == | ||
| + | * This particular design lights enough lit charcoal to fill a small barbecue, perfect for cooking a few burgers at a time. If you need to fill a large barbecue then you may want to make more than one of these or consider purchasing a larger one. | ||
| + | * To see this Charcoal Chimney in action go to [[Light charcoal without lighter fluid]] | ||
| − | == | + | |
| − | + | ||
| + | == Bibliography == | ||
| + | * ISBN 1563058669 | ||
| + | * ISBN 0761120149 | ||
| + | * ISBN 1558322973 | ||
| + | |||
| + | |||
| + | |||
| + | == Amazon's Related Products == | ||
| + | * ASIN B00004U9VV | ||
| + | * ASIN B00004RALR | ||
| + | * ASIN B00004RALJ | ||
| + | |||
== See Also == | == See Also == | ||
| − | |||
* How to [[Light charcoal without lighter fluid]] | * How to [[Light charcoal without lighter fluid]] | ||
| Line 50: | Line 80: | ||
| − | + | [[Category:Outdoor cooking]] | |
| − | |||
| − | |||
Latest revision as of 20:33, 2 January 2011
Lighting charcoal briquettes without lighter fluid is easy with this homemade Charcoal Chimney
Contents
Materials Needed
- 1 #10 tin can (coffee can)
- 1 can opener
- 1 church key
- 2 Wire coat hangers
- 1 drill with a 1/8" drill bit
- 1 pair of diagonal cutters
- 1 pair of needle nose pliers
Making the Charcoal Chimney
Placing the holes
- Begin with a clean #10 tin can remove any labeling that may be on the can.
- With the can opener remove both ends to form a basic chimney (Fig 1)

- Using the church key make a series of triangular holes on one side of the can separated by about 2 inches (see Fig 2.) (this side will be referred to as the bottom)

- Drill two sets of eight holes about 3 inches from the bottom of the can (see Fig 3.) with about 3/4 of an inch separating the 2 holes in each set

- Drill 4 holes for handle (see illustration)
Making a Wire Mesh
- Open the coat hangers and straighten with the pliers
- Cut the coat hanger into 12 8 inch pieces using the diagonal cutters
- With the pliers form a hook at one end of each of the 12 pieces of wire about 3/4" in diameter
- Thread the straight end of the wire through the can to it's opposite hole making sure to thread the hook end into it's corresponding hole

- Insert the hook into the the hole nearest it and using the pliers, on the inside of the can bend the wire so that it cannot be removed from the can (see Fig 5. for what this should look like)
- Repeat the inserting process for all the holes, you may have to drill additional holes and place additional wires to make a tighter mesh depending on the size of charcoal you plan to use. (I had to do this, see Fig 5.)

Making the Handle
- For the handle drill 2 sets of two holes, one set at the top of the can and another near the mesh. Drill the sets vertically
- take the remainder of the coat hanger and fasten it in the same manner done when creating the mesh (See Fig 6.)

Warnings
- Be careful, I cut myself twice while building this be smarter than me, use gloves.
- I make absolutely no claim to the safety of this project, make it and use it at your own risk. There are professionally built Charcoal Chimneys on the market (see #Amazon's Related Products below.) Please consider buying one if for any reason you feel uncomfortable about making your own.
Usage Notes
- This particular design lights enough lit charcoal to fill a small barbecue, perfect for cooking a few burgers at a time. If you need to fill a large barbecue then you may want to make more than one of these or consider purchasing a larger one.
- To see this Charcoal Chimney in action go to Light charcoal without lighter fluid
Bibliography
- ISBN 1563058669
- ISBN 0761120149
- ISBN 1558322973
Amazon's Related Products
- ASIN B00004U9VV
- ASIN B00004RALR
- ASIN B00004RALJ
See Also
External Links
- Chimney Starter Wikipedia Article