Difference between revisions of "Make a charcoal chimney"
Jump to navigation
Jump to search
(Added Bibliography and ASIN sections) |
(Added more info - Still in progress) |
||
| Line 1: | Line 1: | ||
| − | Lighting charcoal | + | Lighting charcoal briquettes without lighter fluid is easy with this '''homemade Charcoal Chimney''' |
| Line 7: | Line 7: | ||
* 1 can opener | * 1 can opener | ||
* 1 church key | * 1 church key | ||
| − | * | + | * 2 Wire coat hangers |
| − | * 1 drill with a | + | * 1 drill with a 1/8" drill bit |
* 1 pair of diagonal cutters | * 1 pair of diagonal cutters | ||
| − | * 1 pair of needle nose | + | * 1 pair of needle nose pliers |
| − | == | + | == Making the Charcoal Chimney == |
| + | |||
| + | === Placing the holes === | ||
* Begin with a clean #10 tin can remove any labeling that may be on the can. | * Begin with a clean #10 tin can remove any labeling that may be on the can. | ||
| − | * | + | * With the can opener remove both ends to form a basic chimney (Fig 1) |
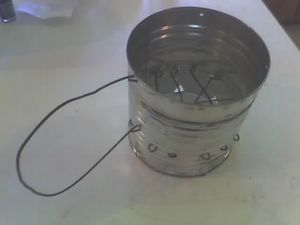
| − | * Using the church key make a series of triangular holes on one side of the can | + | * Using the church key make a series of triangular holes on one side of the can separated by about 2 inches (see Fig 2.) (this side will be referred to as the bottom) |
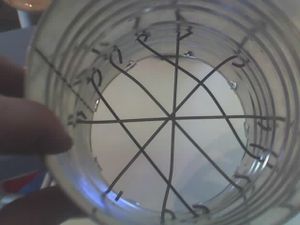
| − | * | + | * Drill two sets of eight holes about 3 inches from the bottom of the can (see Fig 3.) with about 3/4 of an inch separating the 2 holes in each set |
| − | * | + | * Drill 4 holes for handle (see illustration) |
| + | |||
| + | |||
| + | === Making a Wire Mesh === | ||
| + | |||
| + | * Open the coat hangers and straighten with the pliers | ||
| + | * Cut the coat hanger into 12 8 inch pieces using the diagonal cutters | ||
| + | * With the pliers form a hook at one end of each of the 12 pieces of wire about 3/4" in diameter | ||
| + | |||
| + | |||
| + | ==== Threading the Holes ==== | ||
| + | # Thread the straight end of the wire through the can to it's opposite hole making sure to thread the hook end into it's corresponding hole | ||
| + | # With the pliers form a hook at the opposite end of each of the wire and thread through it's corresponding hole. | ||
| + | # Using the pliers bend the hooks on the inside part of the can so they cannot be removed | ||
| + | # repeat for each wire | ||
| + | |||
| Line 27: | Line 44: | ||
|[[image:chimney02.jpg|thumb|left|Fig 2. Placing Triangular Holes]] | |[[image:chimney02.jpg|thumb|left|Fig 2. Placing Triangular Holes]] | ||
|- | |- | ||
| − | |[[image: | + | |[[image:charcoal-chimney-holes.gif|thumb|left|Fig 3. Placing 2 sets of 8 1/8" holes]] |
| − | |[[image: | + | |[[image:chimney03.jpg|thumb|left|Fig 4. Threading the Hanger wire]] |
|- | |- | ||
| − | | | + | |[[image:chimney04.jpg|thumb|left|Fig 5. Finished Wire Mesh]] |
| + | |[[image:chimney05.jpg|thumb|center|Fig 6. Finished product]] | ||
|} | |} | ||
== Warnings == | == Warnings == | ||
| − | Be careful, I cut myself twice while building this be smarter than me, use gloves. | + | * Be careful, I cut myself twice while building this be smarter than me, use gloves. |
| + | * I make absolutely no claim to the safety of this project, make it and use it at your own risk. There are professionally built Charcoal Chimneys on the market (see [[#Amazon's Related Products]] below please consider buying one if for any reason you feel uncomfortable about making your own. | ||
Revision as of 18:00, 11 July 2006
Lighting charcoal briquettes without lighter fluid is easy with this homemade Charcoal Chimney
Contents
Materials Needed
- 1 #10 tin can (coffee can)
- 1 can opener
- 1 church key
- 2 Wire coat hangers
- 1 drill with a 1/8" drill bit
- 1 pair of diagonal cutters
- 1 pair of needle nose pliers
Making the Charcoal Chimney
Placing the holes
- Begin with a clean #10 tin can remove any labeling that may be on the can.
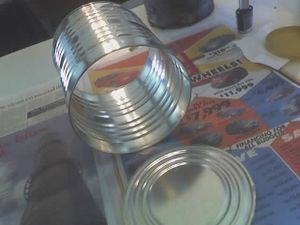
- With the can opener remove both ends to form a basic chimney (Fig 1)
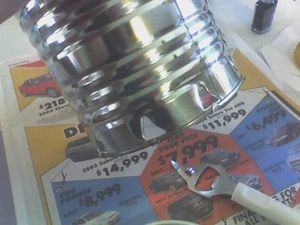
- Using the church key make a series of triangular holes on one side of the can separated by about 2 inches (see Fig 2.) (this side will be referred to as the bottom)
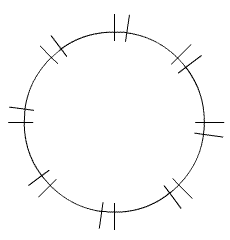
- Drill two sets of eight holes about 3 inches from the bottom of the can (see Fig 3.) with about 3/4 of an inch separating the 2 holes in each set
- Drill 4 holes for handle (see illustration)
Making a Wire Mesh
- Open the coat hangers and straighten with the pliers
- Cut the coat hanger into 12 8 inch pieces using the diagonal cutters
- With the pliers form a hook at one end of each of the 12 pieces of wire about 3/4" in diameter
Threading the Holes
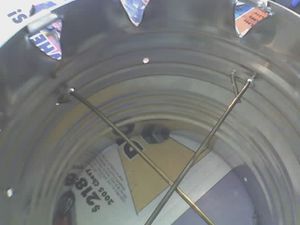
- Thread the straight end of the wire through the can to it's opposite hole making sure to thread the hook end into it's corresponding hole
- With the pliers form a hook at the opposite end of each of the wire and thread through it's corresponding hole.
- Using the pliers bend the hooks on the inside part of the can so they cannot be removed
- repeat for each wire
Images
Warnings
- Be careful, I cut myself twice while building this be smarter than me, use gloves.
- I make absolutely no claim to the safety of this project, make it and use it at your own risk. There are professionally built Charcoal Chimneys on the market (see #Amazon's Related Products below please consider buying one if for any reason you feel uncomfortable about making your own.
More to come
This tutorial is unfinished I will finish it shortly and add another tutorial about How to Light charcoal without lighter fluid using this chimney
Bibliography
- (ISBN 1563058669
- (ISBN 0761120149
- (ISBN 1558322973
Amazon's Related Products
- (ASIN B00004U9VV
- (ASIN B00004RALR
- (ASIN B000F64UKA
See Also
External Links
- Chimney Starter Wikipedia Article
|
NOTE: This page is currently undergoing a major edit. As a courtesy, please do not make edits to this page while this message is posted, in order to avoid edit conflicts. |
