Capture screen images
Jump to navigation
Jump to search
The main purpose of this tutorial is to demonstrate how I create the screen capture images I use in my tutorials.
Contents
How to Capture Screen Images
Software Needed
- A Microsoft windows operating system post win 3.x (9x, ME, 2k, XP)
- Photoshop or your favorite image editor that has the ability to crop an image
- I will be using Photoshop for this tutorial
Steps involved
- Get the image on your screen that you want to capture and press the "Print Screen" button on your keyboard
- Open Photoshop and from the menu select file/new...
- Accept the defaults by clicking OK
- From the menu select Edit/paste
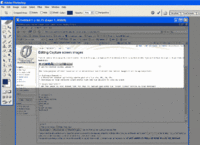
- Use the crop tool to crop the desired area see Fig 1.
- From the menu select File/Save for Web
- Select the most efficient method of saving keep in mind the size of the image. I will often use gif with as few colors as possible.
- name your image something that make sense and is not too ambiguous
There you have it, it's pretty simple
Bibliography
- Digital Images: A Practical Guide
- Adobe Photoshop CC For Dummies For Dummies (Computer/Tech)
- Photoshop CS6: The Missing Manual
Amazon's Related Products
- ABBYY ScreenShot Reader
- Canon EOS Rebel T6 Digital SLR Camera Kit with EF-S 18-55mm f/3.5 Lens, Lexar 64GB and Ritz Gear U3 32GB Memory Cards, Lens Filters, Camera Bag, Flexi-Tripod, and Accessory Bundle
- Roxio Game Capture HD PRO Video Capture Device and Editing Software for PC

